Getting started: Setting up Electronic Invoicing with Sproom
This guide takes you step by step through setting up Electronic Invoicing with Sproom in Business Central — from activating the app to sending your first electronic invoice to Sproom. It covers both integration methods:
- API integration (recommended) — Business Central sends documents directly to Sproom and tracks the delivery status automatically.
- FTP integration — Business Central places the OIOUBL files in an FTP folder that Sproom collects from. Delivery status can only be seen in the Sproom portal.
You only need to set up one method. If in doubt, choose API.
Note: The screenshots in this guide are from Business Central in Danish. The field and action names in the text are the English names.
Before you start
Make sure you have the following ready:
- An agreement with Sproom and access to the Sproom portal.
- For API: The Sproom address (production
https://sproom.netor testhttps://staging.sproom.net) and an API token from Sproom. - For FTP: The folder path, user name and password for the Sproom FTP server — and a private key (.ppk file) if Sproom has provided one.
- A GLN for your own company (Company Information) and for the customers who will receive electronic invoices.
- A user with the permission set Electronic Invoicing With Sproom (normally assigned automatically on installation) and permission to create job queue entries (API only).
Step 1 – Activate the app
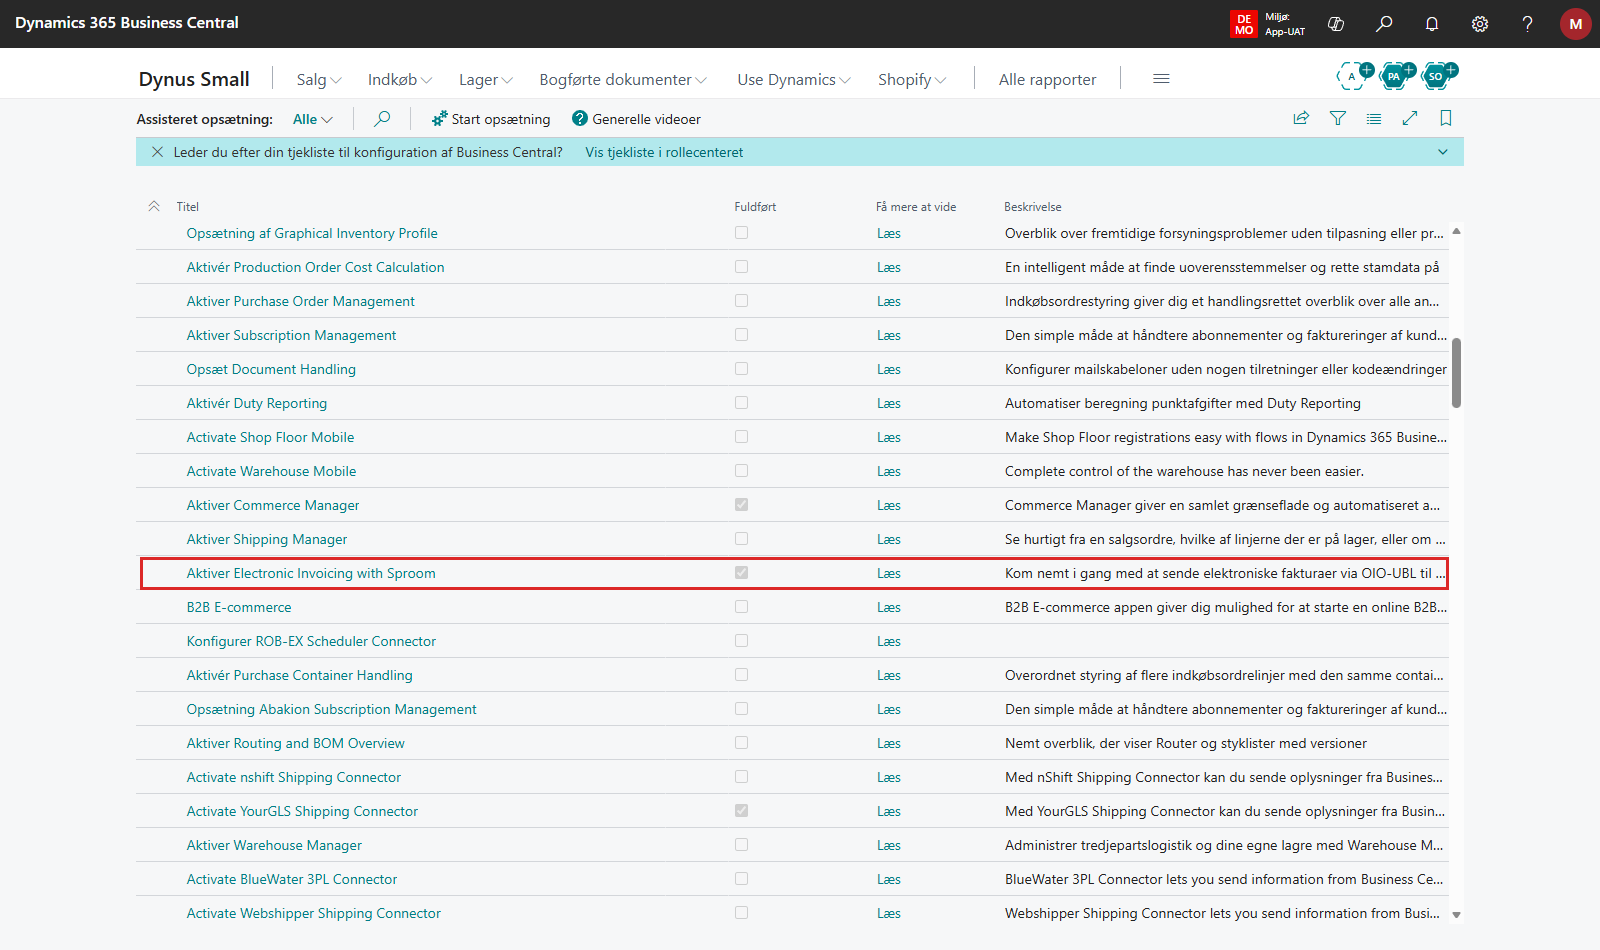
- Choose the search icon, enter Assisted Setup, and open the page.
- Choose Activate Electronic Invoicing with Sproom.
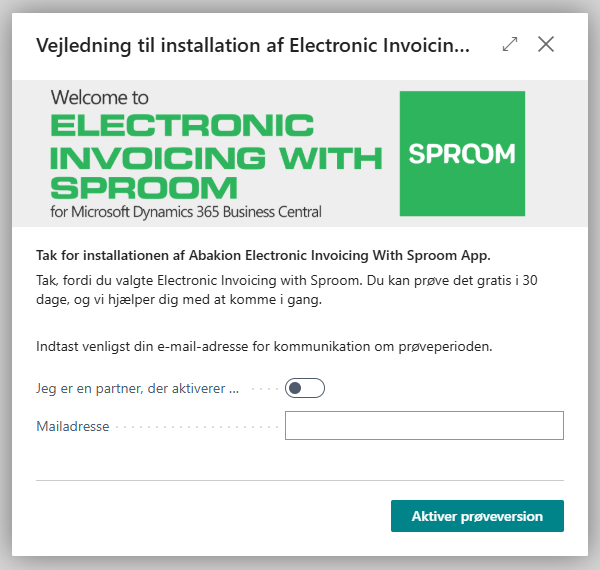
- Enter your email address. If you are a partner activating the app for a customer, select I am a partner activating this on behalf of a client and fill in Partner Email Address.
- Choose Activate Trial. You can now use the app free of charge for 30 days.
- On the next page, you can open the setup directly with the link Press here for the Sproom Service settings in Business Central. Choose Finish to close the guide.
Tip: You can always find the setup again by searching for Sproom Service Settings.
Step 2 – Choose the integration type
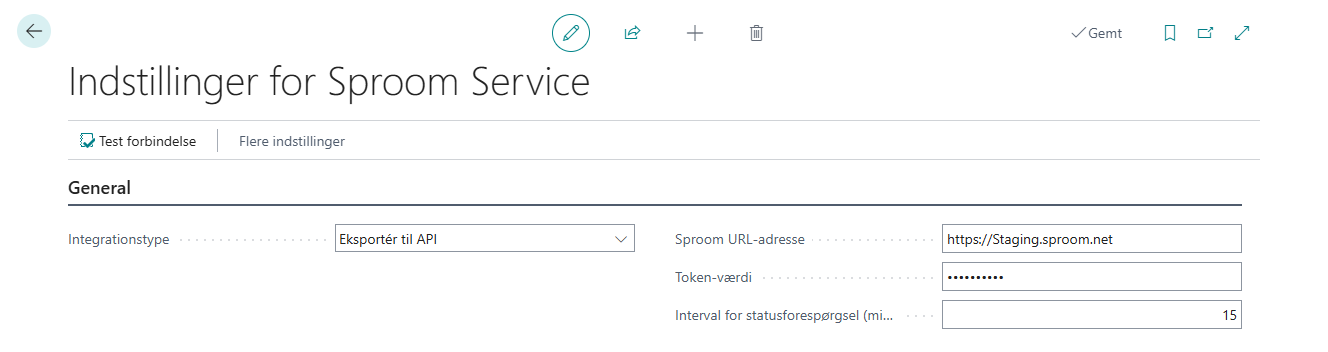
- Search for and open Sproom Service Settings, and choose the pencil (Edit) at the top of the page.
- In the Integration Type field, choose:
- Export to API — continue with Step 3A – Set up the API integration.
- Export to FTP — continue with Step 3B – Set up the FTP integration.
- Disabled — nothing is sent to Sproom (default).
The page only shows the fields that belong to the selected integration type.
Step 3A – Set up the API integration
- In Sproom Url, enter the Sproom address, for example
https://sproom.net. Enter the host name only — don't add/api, the app does that. - Paste the API token from Sproom into Token Value. The token is stored securely and is then shown as
*****. - In Status Polling Interval (Min), specify how often Business Central should retrieve the status of sent documents. The default is 15 minutes.
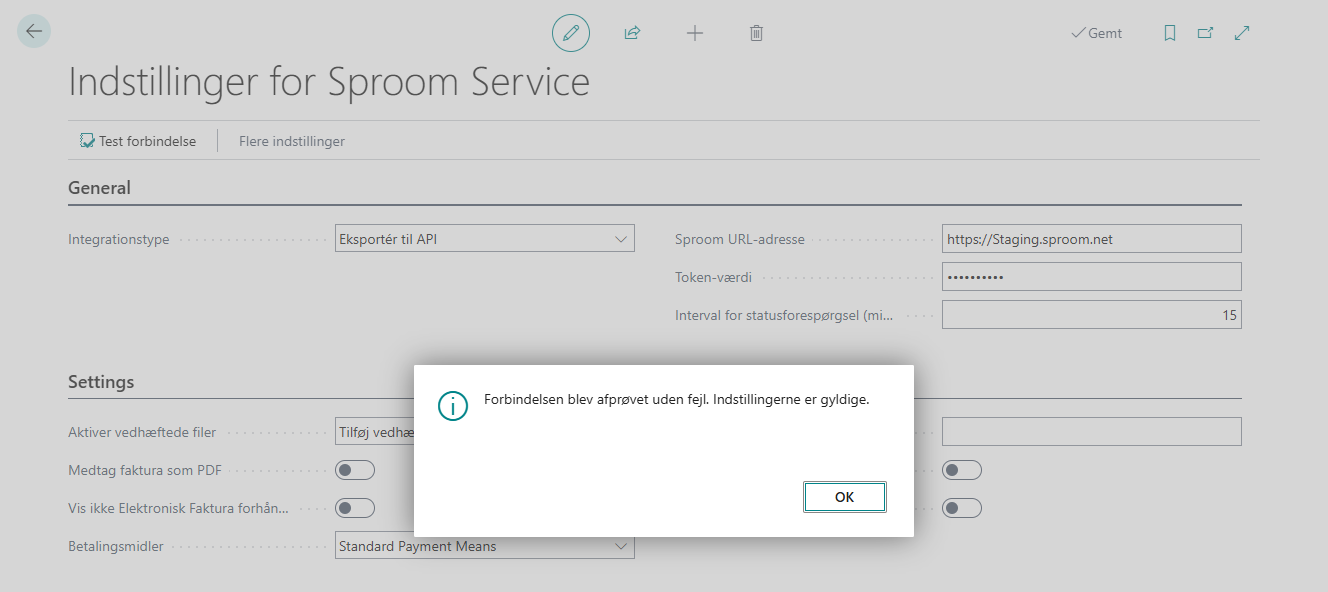
- Choose the Test Connection action. When the setup is correct, the message The connection test was successful. The settings are valid. is shown.
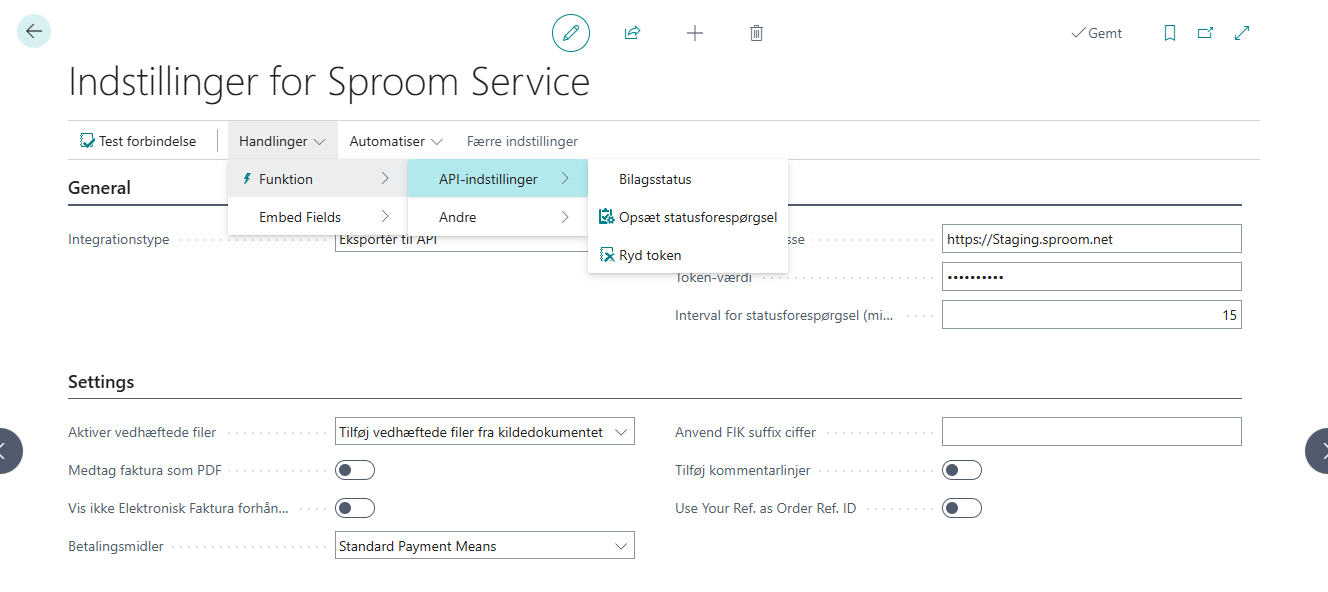
- Choose More options > Actions > Functions > API Settings > Setup Status Polling. This creates a job queue entry that automatically retrieves the delivery status from Sproom. The message Status polling job queue scheduled. is shown.
- Optionally, check on the Job Queue Entries page that the entry for SCB Sproom Status Poller has the status Ready.
Note: Run Setup Status Polling again if you change the interval, or if the environment has been copied or moved. If the job queue entry has the status Error, open it to see the error, fix the cause and choose Set Status to Ready.
Changing the token: Use Actions > Functions > API Settings > Clear Token to remove the stored token, and then enter the new one in Token Value.
Continue with Step 4.
Step 3B – Set up the FTP integration
- In Folder Path, enter the path to the folder on the Sproom FTP server. A trailing slash is added automatically.
- Fill in User Name and User Password.
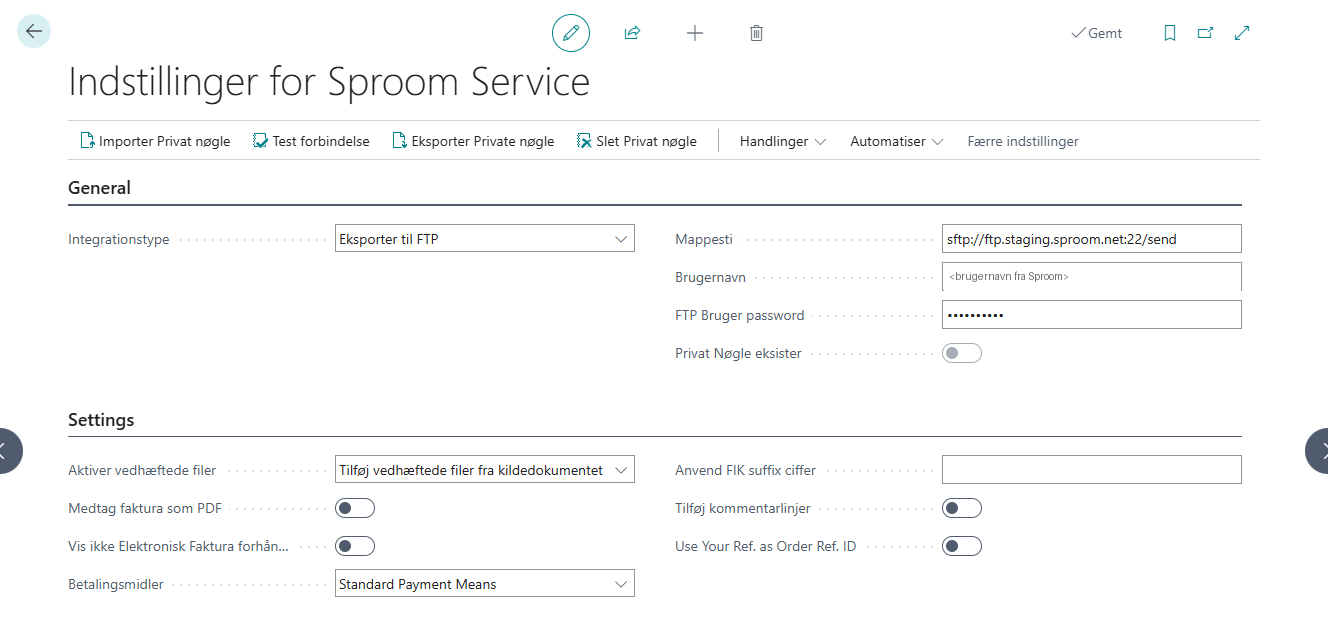
- If Sproom has provided a private key, choose the Import Private Key action at the top of the page and select the .ppk file. The Private Key Exists field is selected. When a key exists, it is used instead of the password.
- Choose Test Connection to check that the folder path, user name and password/key are accepted.
Note: With the FTP integration, the delivery status is not tracked in Business Central. Log in to the Sproom portal to see whether a document has been delivered.
Moving an environment: Use Export Private Key in the old environment and Import Private Key in the new one to move the key. Delete Private Key removes the key, after which the password is used.
Step 4 – Choose the content of the electronic documents
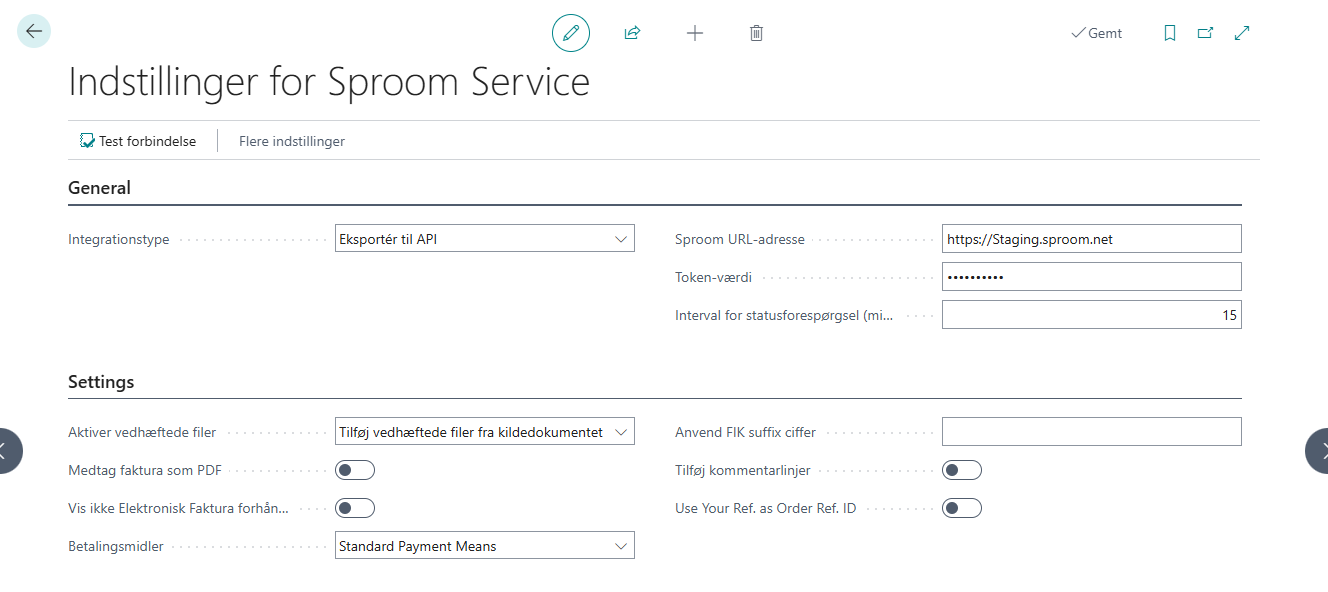
At the bottom of the Sproom Service Settings page, you choose what the electronic documents should contain. The settings apply to both API and FTP.
| Field | What it does |
|---|---|
| Enable Attachments | Includes attachments from the posted sales document. |
| Include Invoice as PDF | Embeds the printed invoice as a PDF in the electronic document. |
| Payment Means | Selects the payment means in the OIOUBL document, for example standard or FIK. |
| Apply FIK Suffix Digit | Specifies the optional digit between the document number and the check digit in the FIK payment ID. |
| Add Comment Lines | Includes comment lines (lines without a type, with a description only). |
| Use Your Ref. as Order Ref. ID | Sends the value from Your Reference as the order reference. |
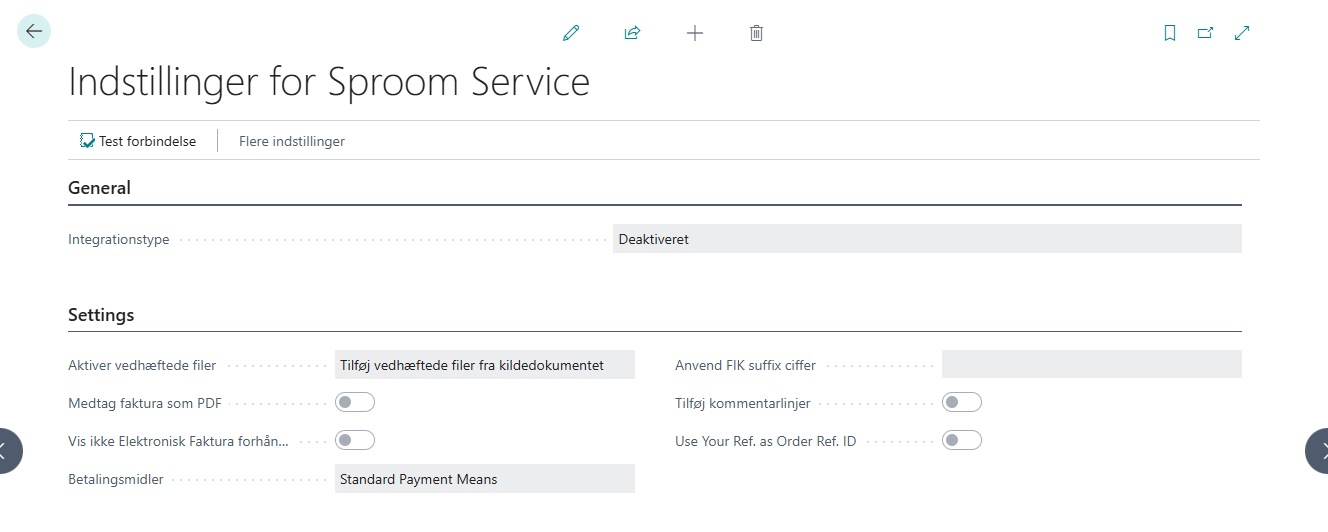
To include the value of a specific field as a note in the XML file, choose Actions > Embed Fields > Table Fields and specify the table and field.

Step 5 – Set up the customers
- Open the customer card for a customer who will receive electronic invoices.
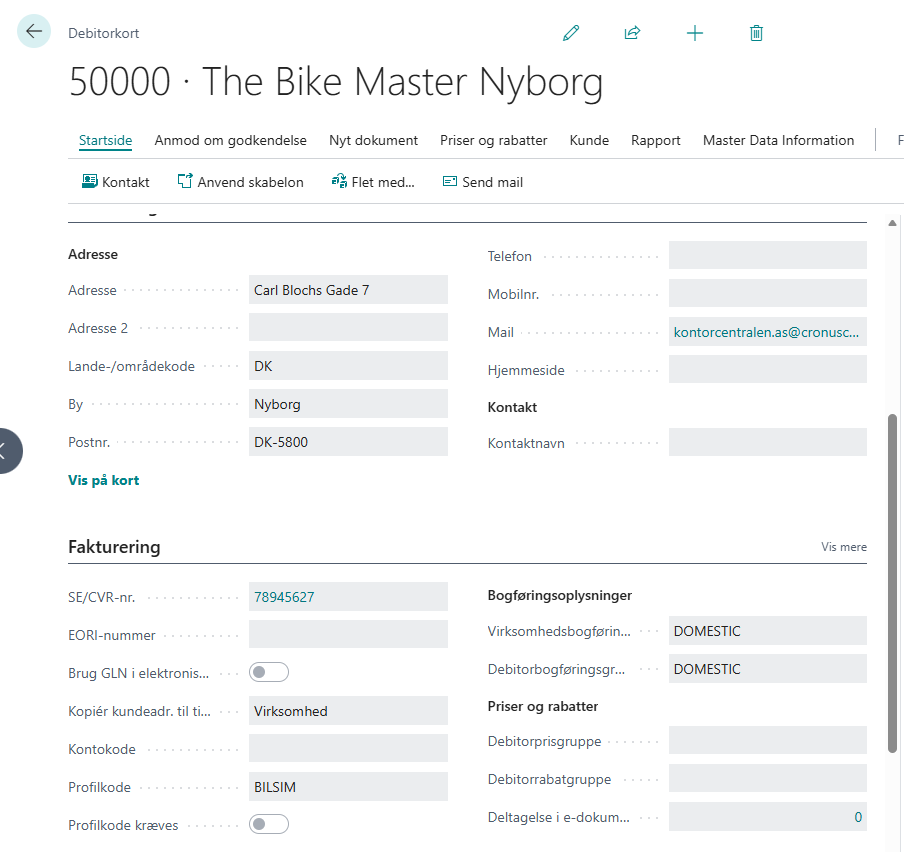
- On the Invoicing FastTab, fill in VAT Registration No. Choose Show more to see and fill in GLN. Without a GLN, an electronic invoice cannot be created.
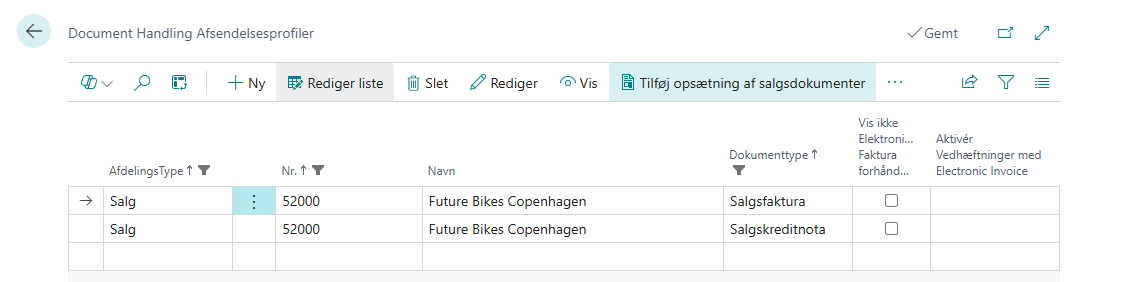
- Choose Customer > Document Handling Sending Profile. Choose Add Sales Document Setup to create lines for, among others, sales invoices and sales credit memos.
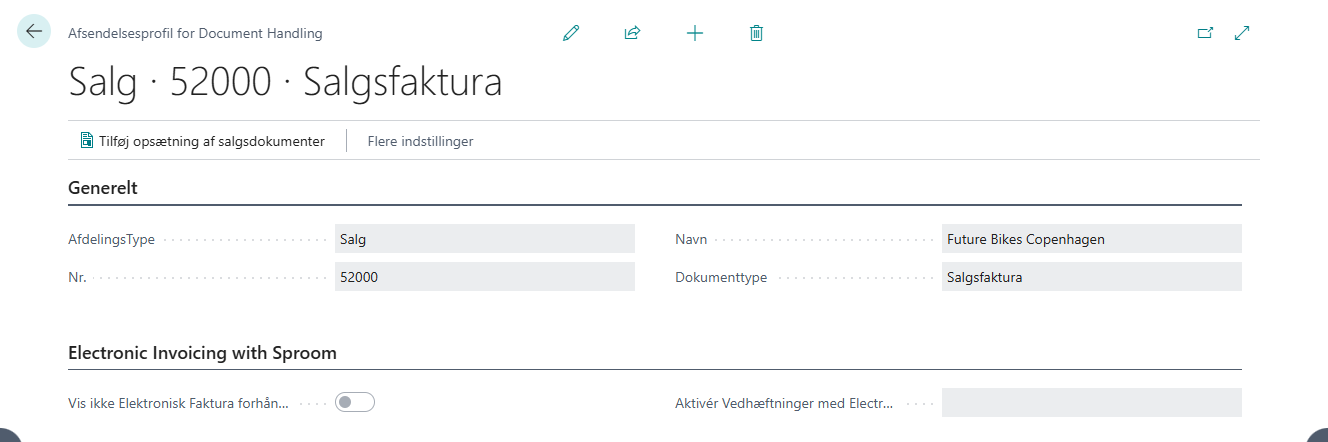
- Open the line for Sales Invoice (and then Sales Credit Memo), and set Post and send by to Electronic Document – or Email And Electronic Document if the customer should also receive an email.
- Under Electronic Invoicing with Sproom, you can choose for the individual customer whether attachments should be included (Enable Attachments with Electronic Invoice).
Also remember to fill in GLN and VAT Registration No. in Company Information.
Step 6 – Send the first electronic invoice
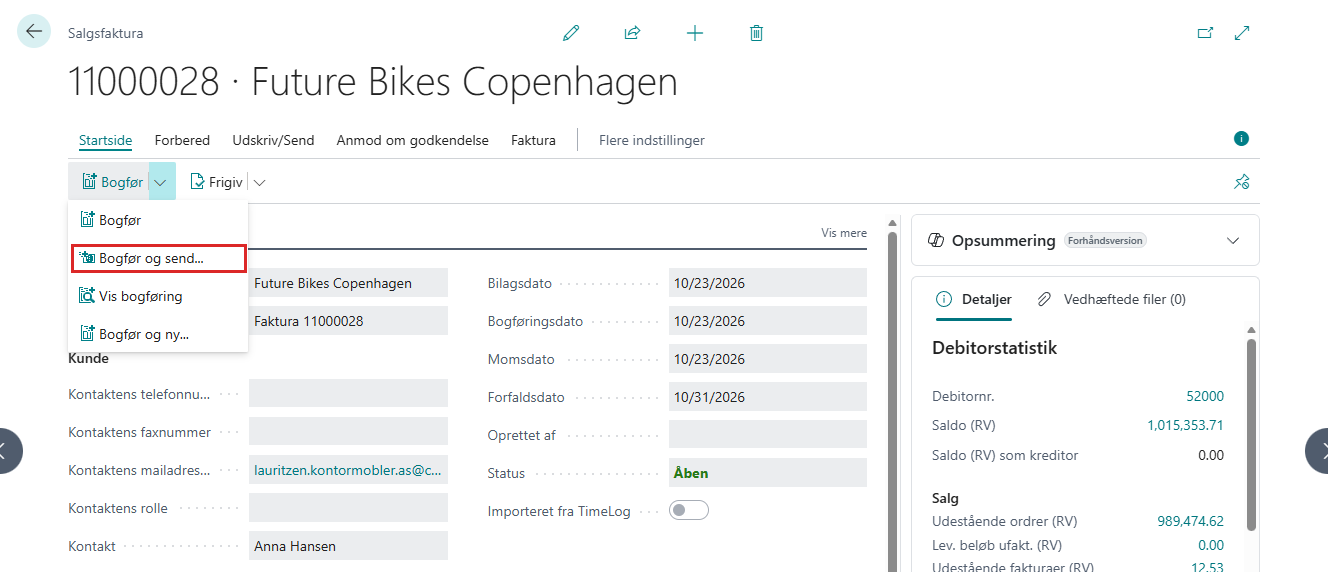
- Create a sales invoice for the customer, choose the arrow next to Post, and choose Post and Send....
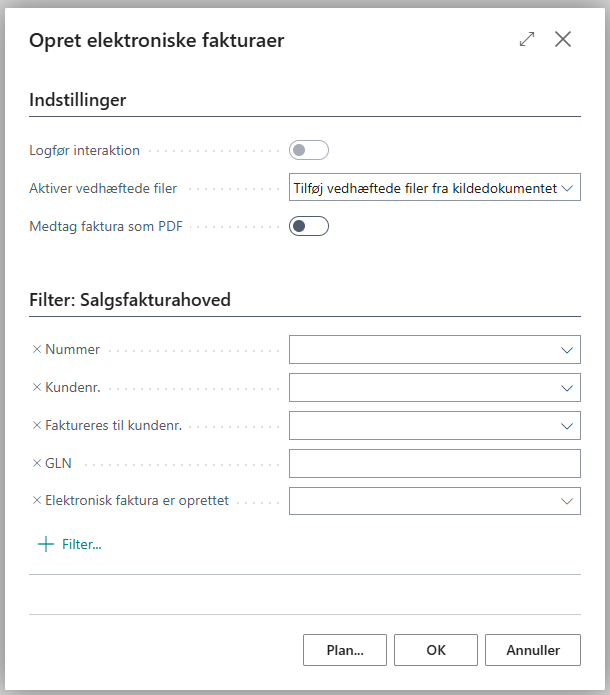
- The Create Electronic Invoices page is shown. Here you can choose Enable Attachments and Include Invoice as PDF for this document only. Choose OK.
- The document is sent to Sproom using the selected integration type.
Step 7 – Track the delivery status (API)
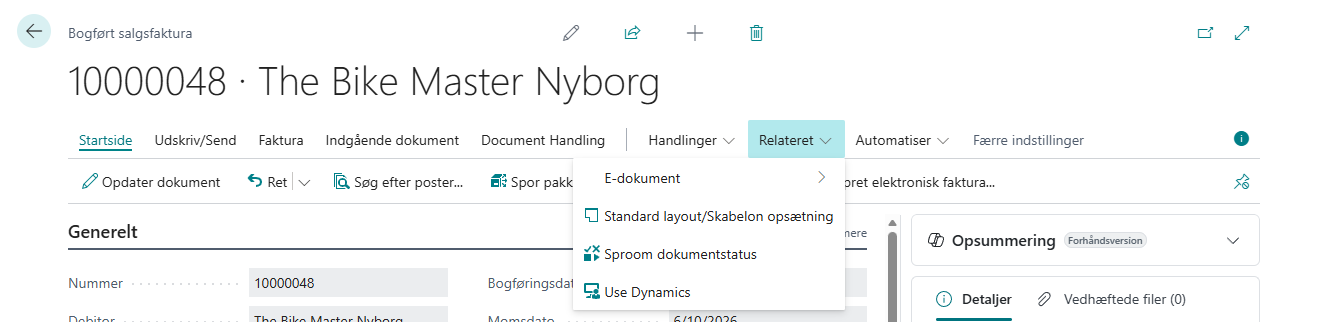
- Open the posted sales invoice, and choose More options > Related > Sproom Document Status.
- The Sproom Document Activity Status page shows the State, Message and Hint for the document. The status is updated automatically by the job queue; choose Refresh Now to retrieve it immediately.
- If the document was rejected, the reason is shown in Message, and Hint tells you what to fix. Use Look Up Recipient to open the recipient's registration in NemHandelsregistret.
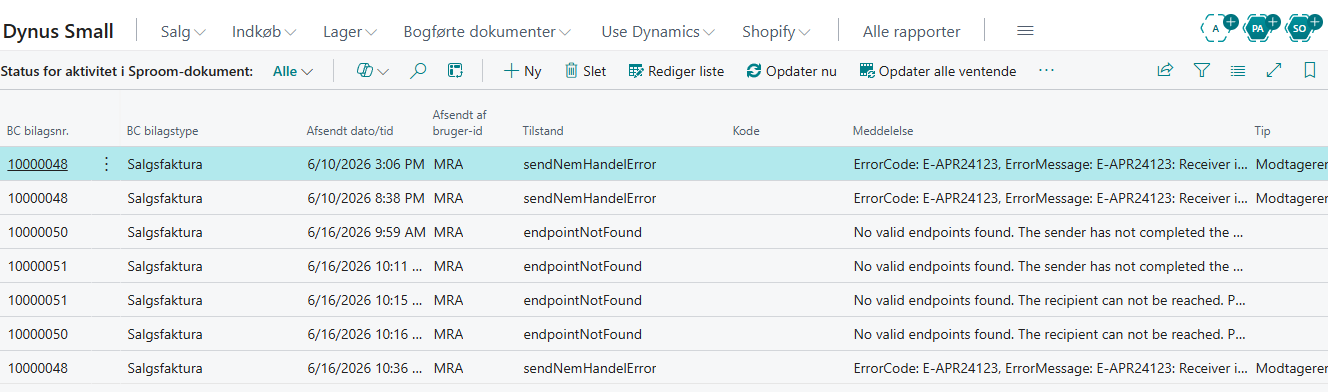
You can also search for Sproom Document Activity Status to see all sent documents.
Troubleshooting
| Message | Solution |
|---|---|
| Sproom Token is not configured. | Enter the API token in Token Value (Step 3A). |
| Electronic Invoice cannot be created because the GLN is missing on the customer/document. | Fill in GLN on the customer or the sales document, and post again. |
| Sproom rejected the document … | Read the hint after "fix:" — for example Set GLN on the customer, Set VAT Registration No. on the customer/Company Information or Set External Document No. on the sales document. |
| The status is not updated | Check that the job queue entry for SCB Sproom Status Poller has the status Ready and not Error, or run Setup Status Polling again. |
| Receiver … is not recognized by the receiving endpoint / endpointNotFound | The recipient is not registered in NemHandelsregistret with the GLN/CVR that was sent. Check the customer's GLN/CVR, and use Look Up Recipient on the status page. |
| Test Connection fails (FTP) | Check the folder path, user name, password and any private key with Sproom. |
Frequently asked questions
Should I use API or FTP?
Choose API unless your agreement with Sproom requires FTP. With API, Business Central tracks the delivery status automatically.
Can I switch from FTP to API later?
Yes. Change Integration Type to Export to API, fill in the URL and token, and run Test Connection and Setup Status Polling.
Where do I find the API token?
The token is issued by Sproom. Contact Sproom if you can't find it in the Sproom portal.